Authors: Tyler Pollard, Buzz Wells
With the introduction of Salesforce Genie at Dreamforce ‘22, Salesforce is giving its customers the capability to connect with data across various platforms in real-time, in one place. Not only will users be able to connect to customer data at scale, but they’ll be able to engage with it holistically, creating a seamless user experience for those working across industries and departments.
One of the platforms Salesforce Genie will be able to access in real time is Snowflake, a cloud-based data store. Snowflake currently has a live connection to another Salesforce tool, CRM Analytics. In this blog, we walk through setting up the live connection for those wishing to use the connector with Genie in the future or leverage live data in CRM Analytics today.
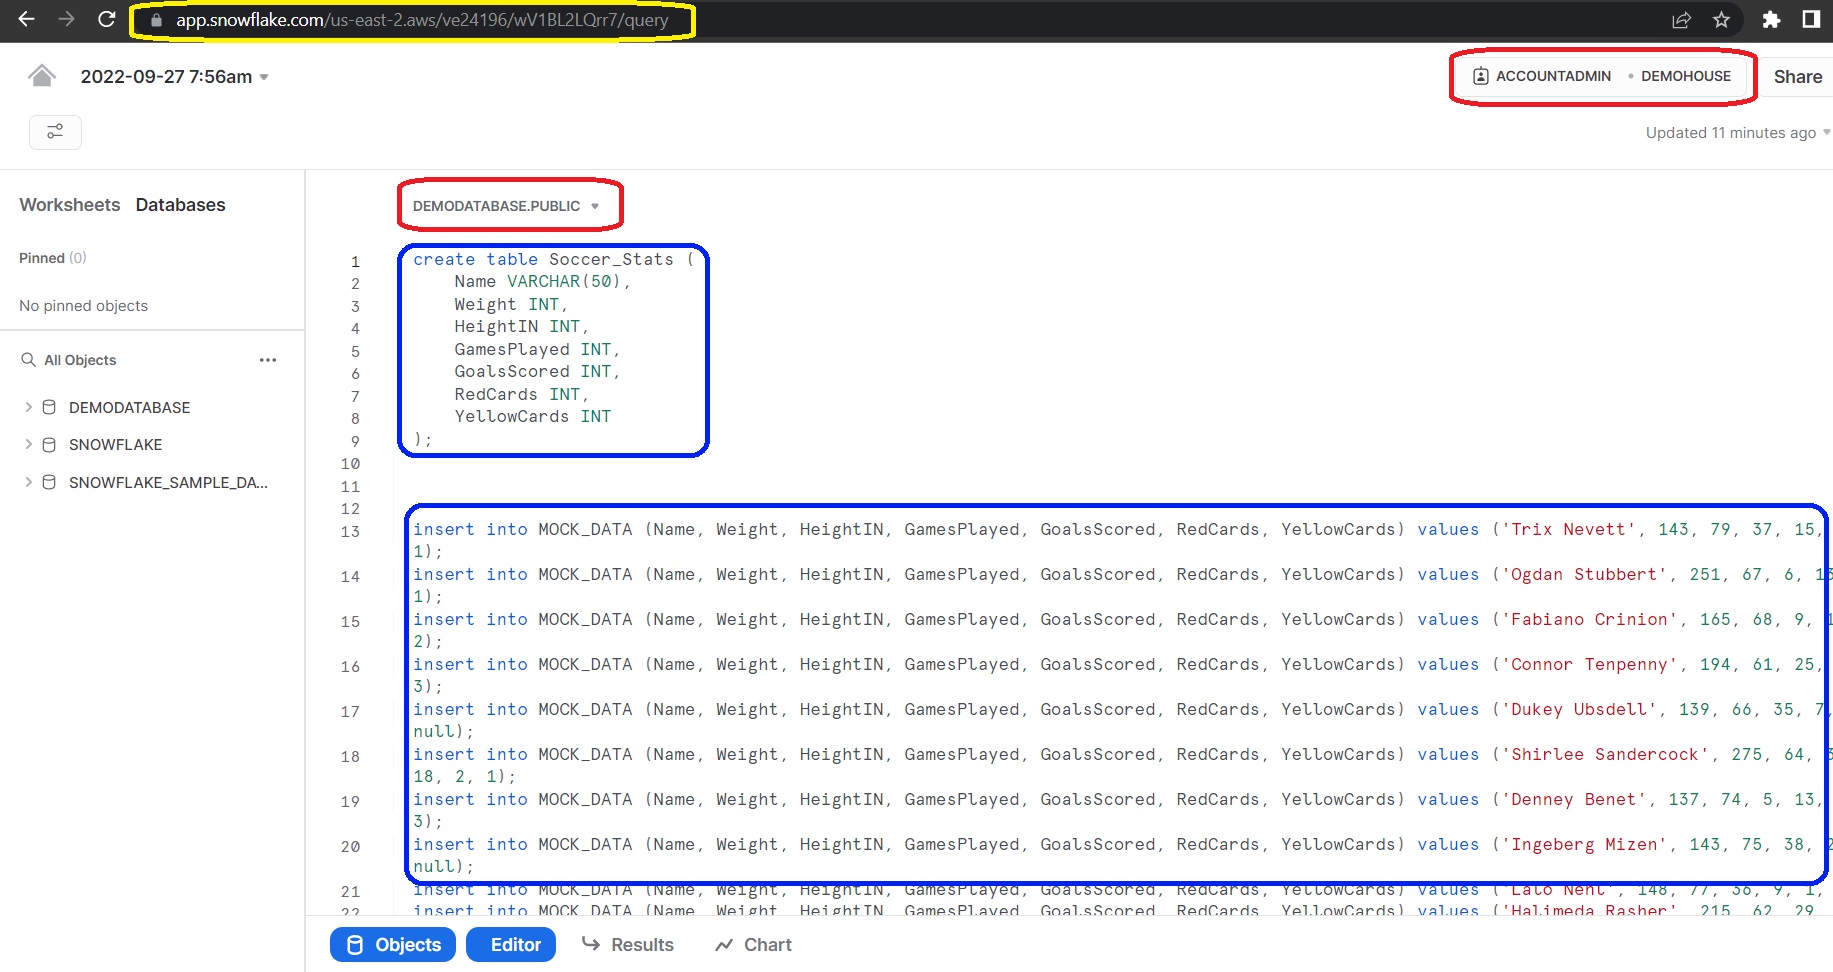
Assuming your Snowflake user has a role with proper privileges, there are three key components of Snowflake that allow a user to create and query data:
- A virtual warehouse that can be scaled to fit your workload.
- A database that holds your schemas.
- A schema which logically organizes your objects (views, tables, etc.)
Circled in red on the left is the chosen database (DEMODATABASE) and schema (PUBLIC), and on the top right in green is the role (ACCOUNTADMIN) and virtual warehouse (DEMOHOUSE). For the purpose of this demo, we have created a mock table with sample data circled in blue below.
Snowflake and CRM Analytics Connector
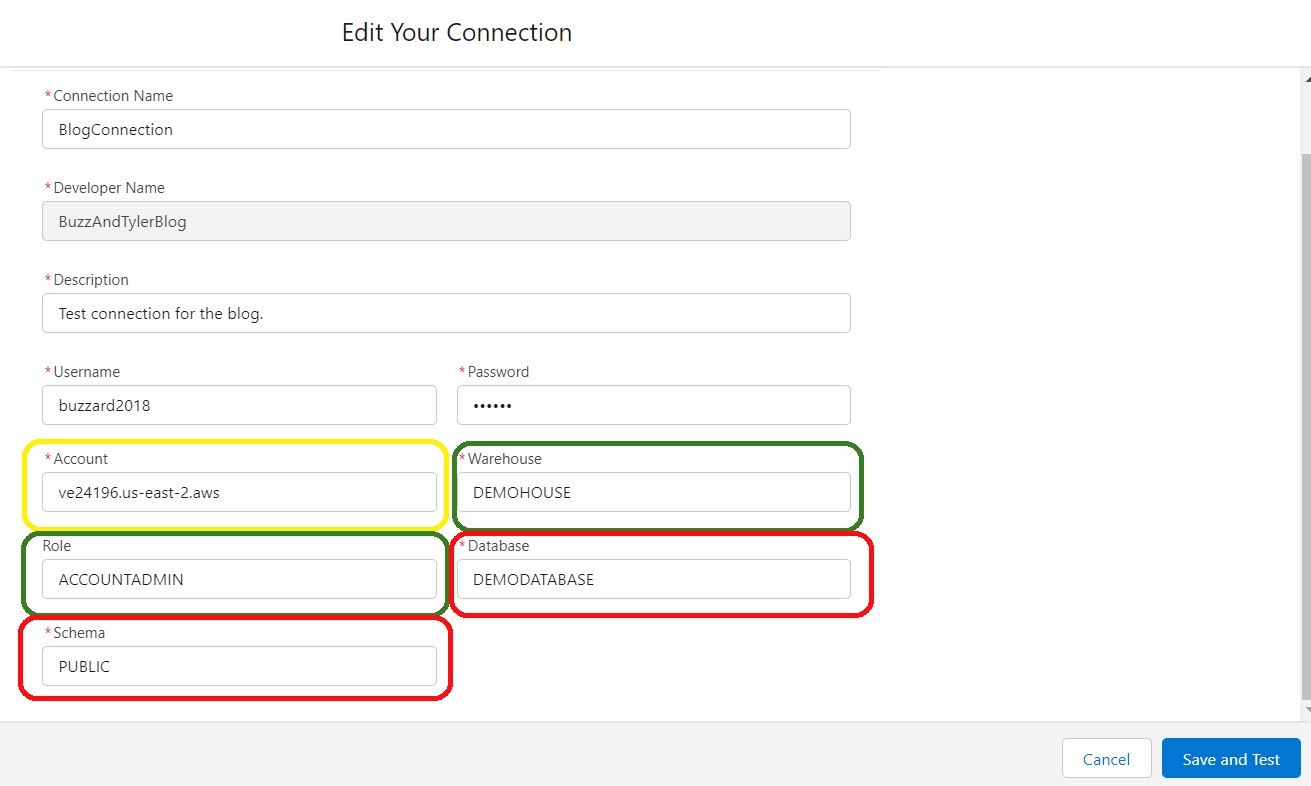
The process for connecting live Snowflake data to your dashboards is made simple by CRM Analytics. To set this connection up, navigate to the Data Manager and then Connections. From there, click “New Connection” and search “Snowflake” in the search bar. Make sure to select the “Snowflake Direct Connector” to have a live connection. When you have made it to the screen below, simply cross-reference the information from your Snowflake worksheet to the “Edit Your Connection” page and click “Save and Test”.
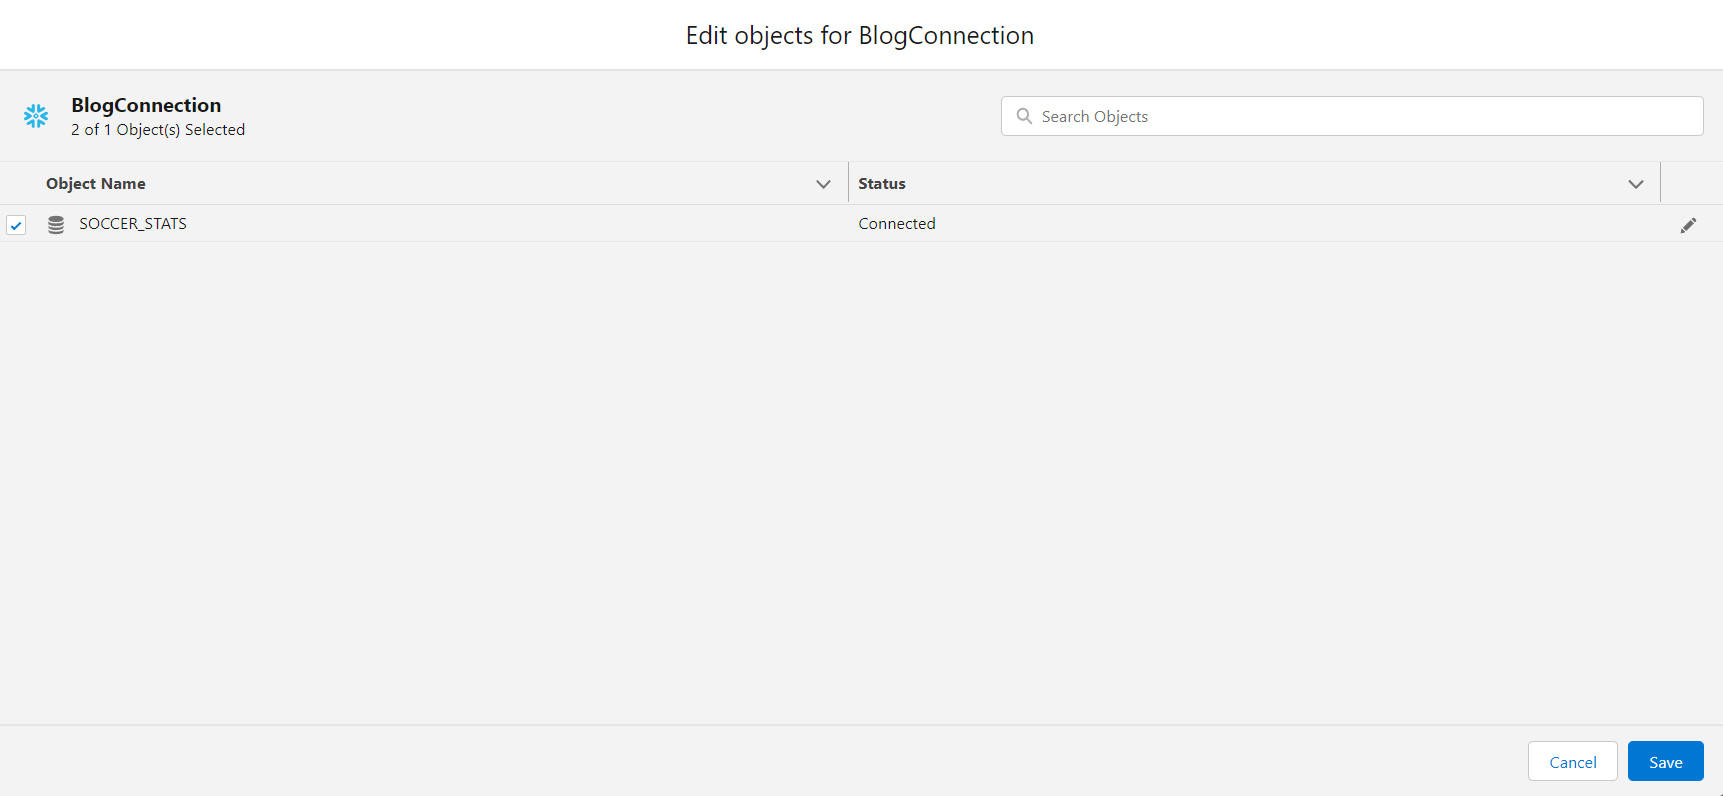
Once your connection has been made successfully, click the small arrow next to your connection and select “Edit Objects”. This will bring you to the screen below where you can view the tables you created in Snowflake. Now, select the table you would like to have a live connection to and click “Save”.
CRM Analytics Dashboard
After the table is successfully connected in CRMA, it will show up as a dataset, accessible in the Analytics Studio.
You can see the dataset appears with a type of “Live” and is located in the Private App of the user who set up the connection. You can hit the dropdown and click “Edit” on the dataset to move it to another app if desired.
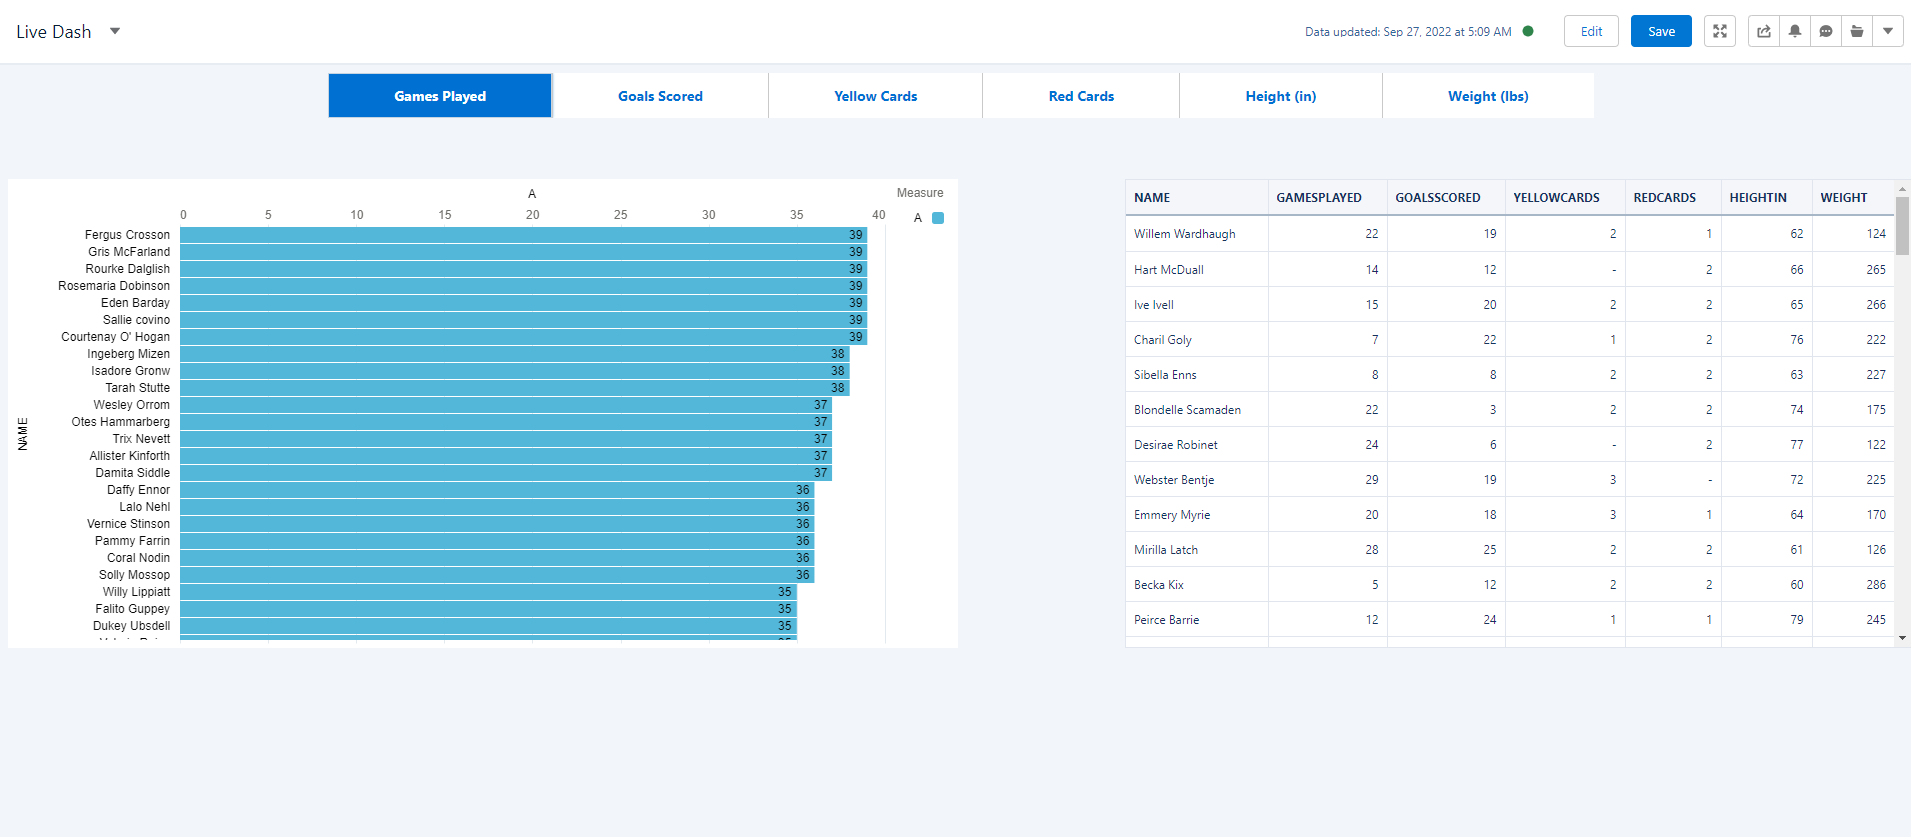
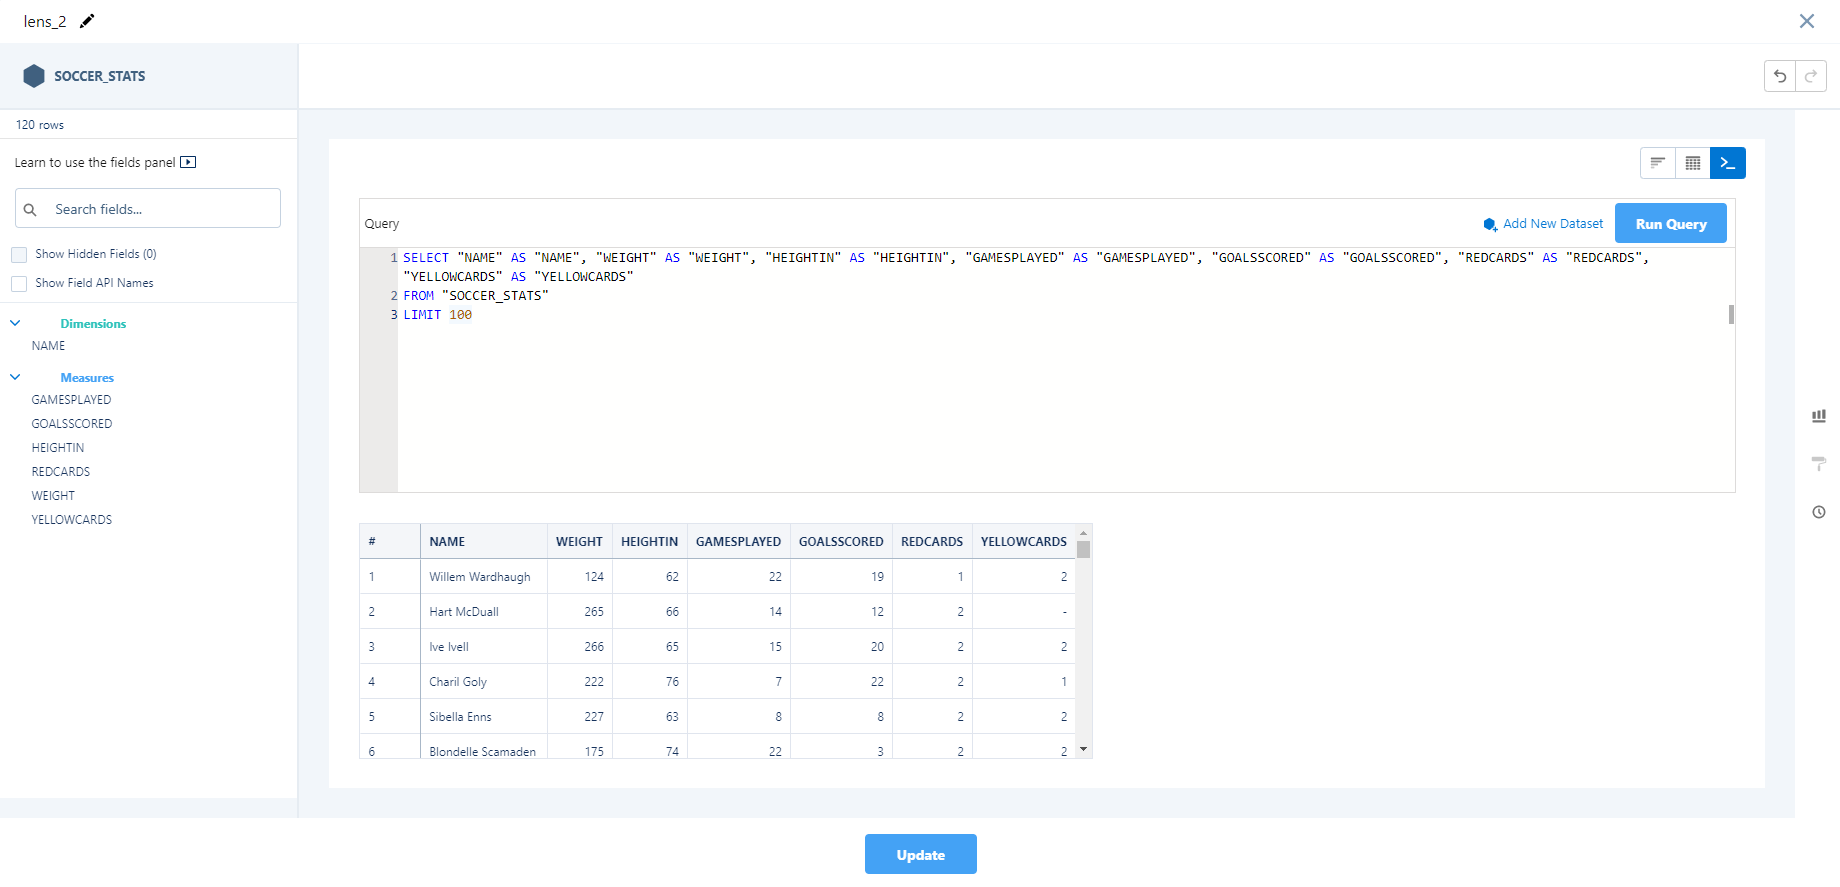
After it’s viewable in CRMA as a dataset, the Snowflake table is now fair game to be used on a dashboard, leveraging SQL for CRM Analytics. On the dashboard, we also utilized the new SQL Bindings.
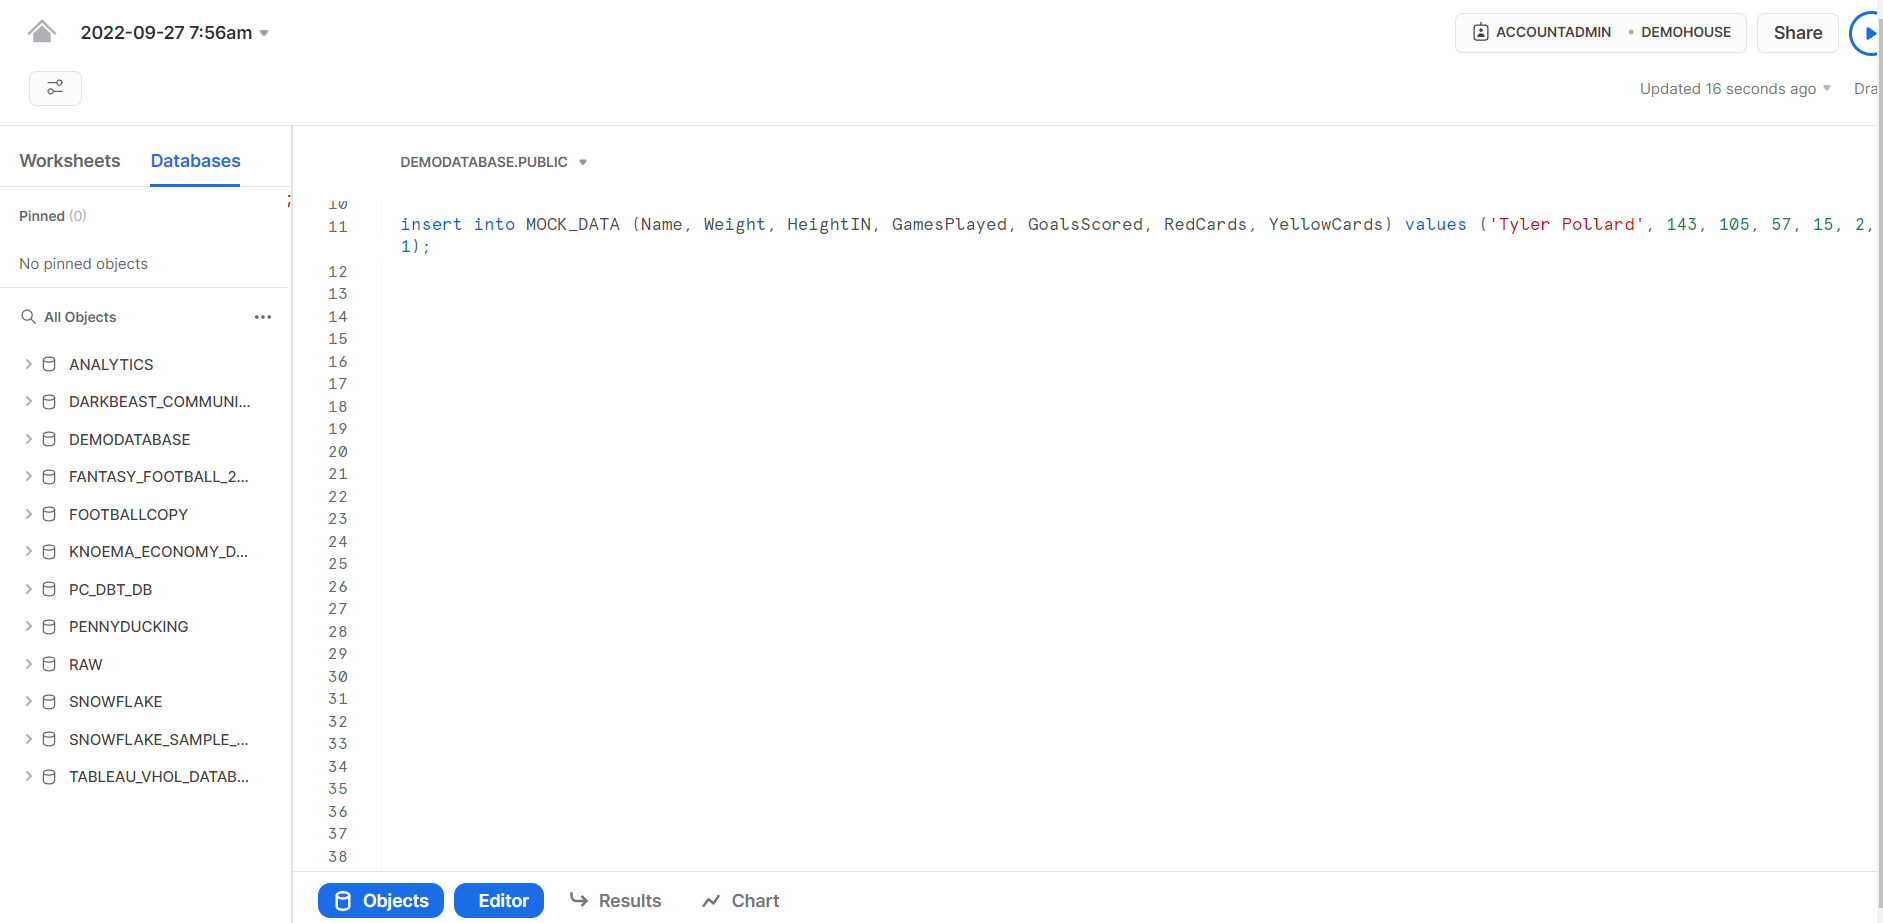
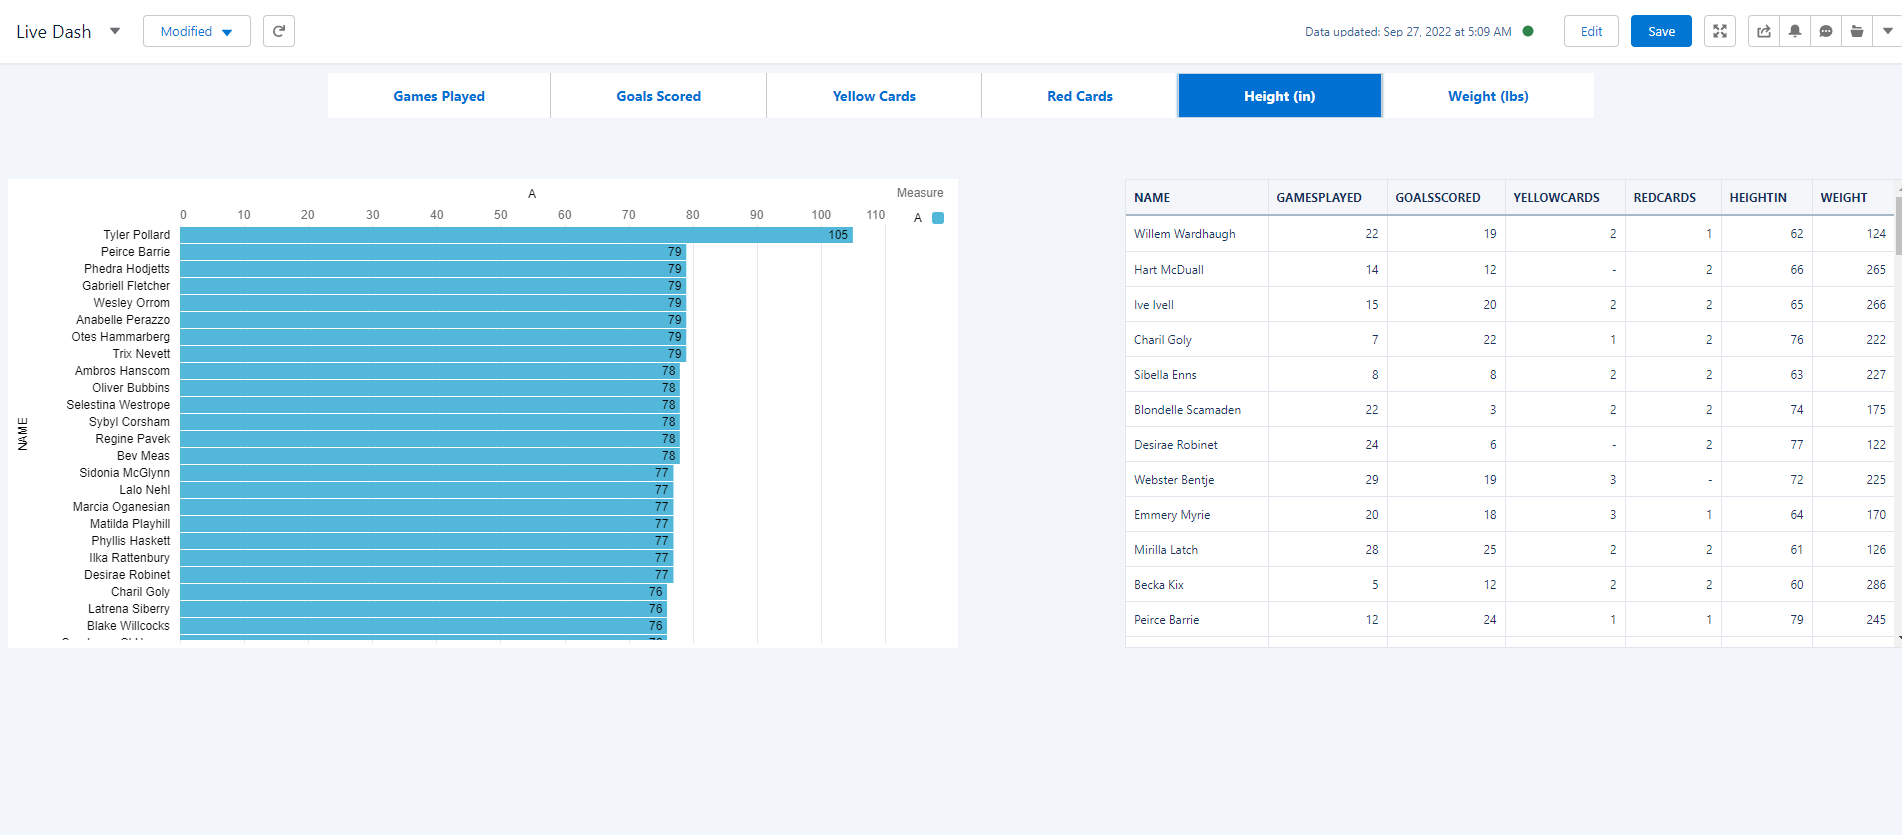
To showcase the live functionality of the Snowflake to CRM Analytics connection, my colleague Buzz added me as a row of data in our Snowflake table. As you can see below, he made me 8 feet 9 inches tall, which makes me much more likely to dunk a basketball than at my current 5 feet 10 inches tall.
Once the command is run in Snowflake, a simple refresh of the dashboard makes our record appear with me as the tallest player, displaying the real-time connection between the Snowflake table and our CRMA dashboard.
Companies don’t just want real-time data, they need it. Salesforce saw this need and proceeded to fill it with the new Genie platform and their strengthened partnership with Snowflake. As we move into 2023 with the rollout of Genie, we should not only see the integration of Snowflake and CRM Analytics, but integration with the entirety of the Salesforce CRM platform and their many partners.
Get in touch to see how we can help you get more out of your Snowflake and CRM Analytics.

