
If you’re looking to connect Snowflake to Tableau and wondering how, you’ve come to the right place. This is a step-by-step overview of how it’s done, and I will take a generalized approach that will work for most use cases.
What you’ll need
- A Tableau Cloud license (with a site role of creator & view and save capabilities set to “allowed” on the project)
- Snowflake Server URL (the URL from Snowflake’s classic console)
- Snowflake username and password
Step 1: Locate your dataset in Snowflake
- Locate where the table you would like to analyze in Tableau is stored within your Snowflake instance.
- Jot down the Warehouse name, Database name, Data schema, and Table name (this will be especially beneficial for complex environments with lots of data sources)
Step 2: Navigate to the Snowflake Connector in Tableau Cloud
- Log in to your Tableau Cloud site and locate the project folder that you would like to embed the Snowflake data source in
- Within the project folder, select New → Published Data Source → Connectors → Snowflake
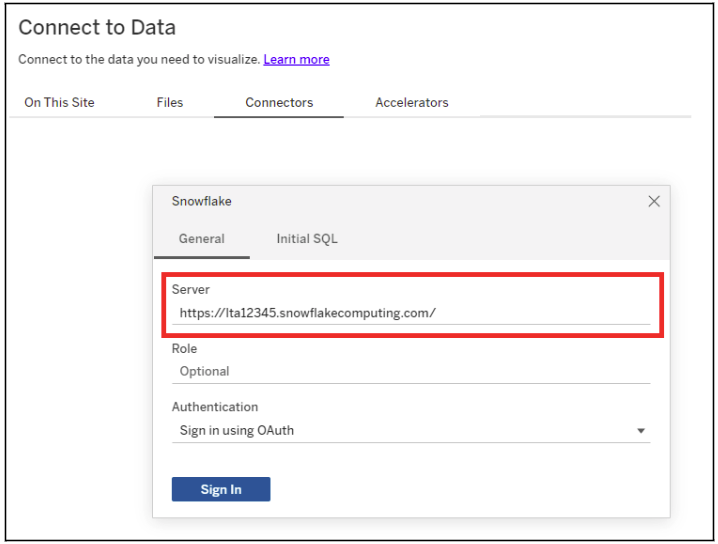
Step 3: Copy and paste your Snowflake URL into the “Server” field
- Paste your URL into the Server field
- Double check that you are using the correct Snowflake URL (The URL from the classic console in Snowflake)
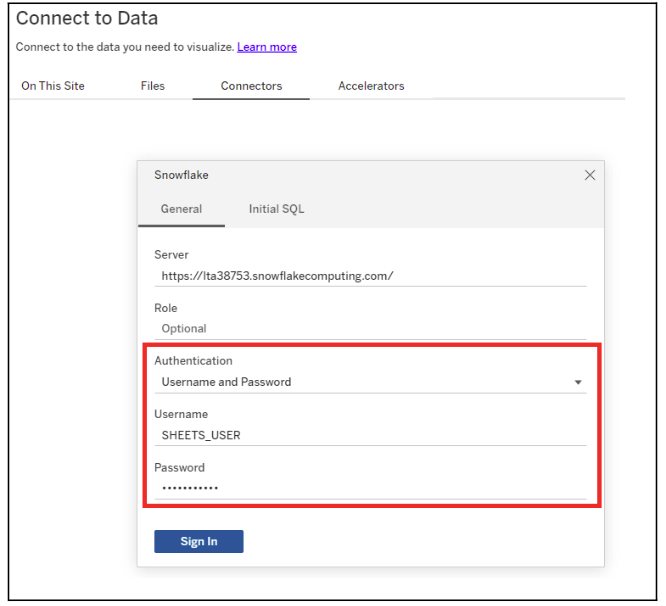
Step 4: Sign in with your Snowflake credentials
- Select “Username and Password” as the authentication method
- Fill out the rest of the fields with your Snowflake username and password
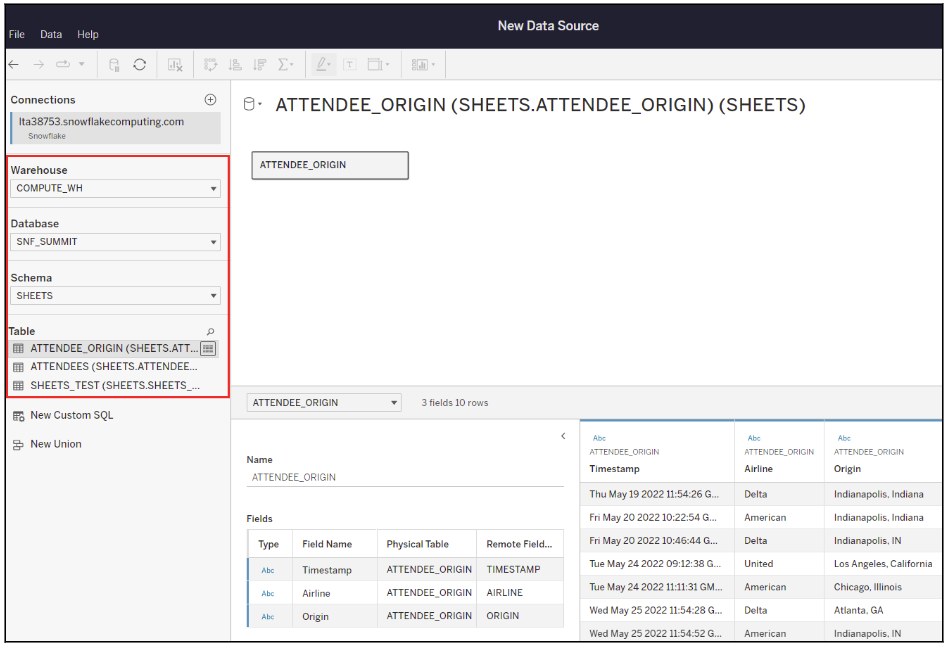
Step 5: Make the same file path selections you jotted down in Step 1
- Make the same Warehouse, Database, Schema, and Table selections you wrote down in Step 1 (note: not all of these selections may apply to your use case)
- Double click on your tables of interest to add them to the view
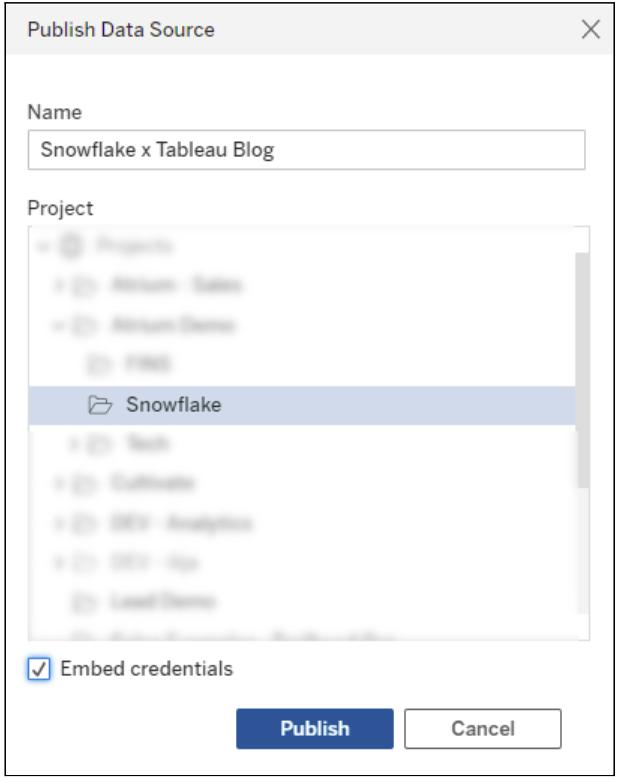
Step 6: Publish the data source
- Once you have chosen your table of interest, select the blue “Publish As…” button in the top right corner
- Name your data source and select the location you would like the data source to be stored in (it should default to the project/workbook folder you originally clicked)
- If applicable, select “Embed credentials”. This will enable anyone with access to the workbook to consume the new data source without having to log in to Snowflake (Tableau will pass through the credentials of the person who originally configured the data source). If this option is not selected, users must have their own connection capability to Snowflake
Step 7: Starting visualizing!
- Congratulations! You have successfully published your Snowflake dataset and can begin visualizing it in Tableau
Hopefully you found this step-by-step overview of how to connect Snowflake to Tableau Cloud beneficial. This generalized process will be valid for most Snowflake x Tableau connections, however, further published data source customization may be necessary for your use case (such as configuring extracts or specific permissions). If you have any questions about what makes the most sense for your scenario, let’s talk.


