How To Use Workbench In Salesforce
Workbench is a powerful application that helps developers interact with their Salesforce data. It allows users to quickly and easily insert, update, and export data, and much more! Up to 5 million records can be used, so if you have a lot of data, this is the perfect solution for you. We’ll cover these features more specifically below.
First, go to this page and select the Salesforce environment you’re working in, Production or Sandbox. You can then click the “Login with Salesforce” button.

You’ll then be brought to a page where you can enter your Salesforce credentials.
Now that you’re logged in, you’ll see a navigation bar that lists the types of functionality that Workbench provides.
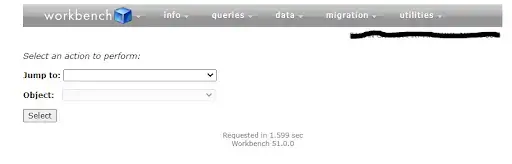
Let’s take a look at what we can do with each of these options.
Info
The info tab contains 3 sections:
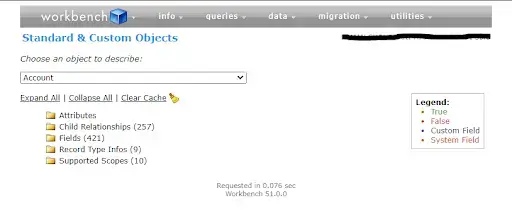
1. Standard and Custom Objects
Here you can see information about your Salesforce Org’s standard and custom objects. Workbench displays the objects’ child relationships, the record types, attributes, fields and supported scopes.
2. Metadata types & Components
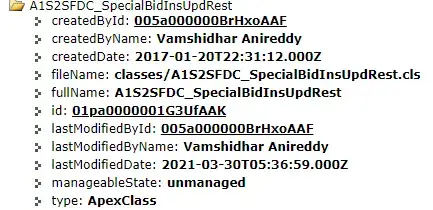
This option is helpful for consultancy companies if they need to evaluate the complexity of a particular client’s Salesforce Org, which is useful for sizing projects. It shows details regarding Aura Components, Apex Class, Permission sets, LWC Components, etc.

In the above example, you can see the Apex class count and names. Clicking a class name will expand it to reveal further information, as shown below.
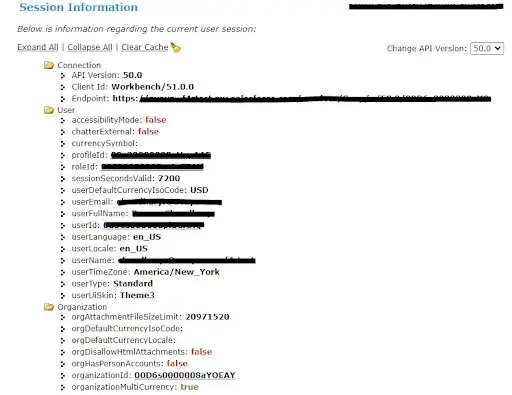
3. Workbench Session Information
The Session Information section shows details about the current user, such as their accessibility mode, profile id, email, full name, and more. System Administrators can also use this to cancel a user’s session.
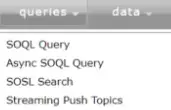
Queries
The next main option on the navigation bar is Queries. This allows you to perform an SOQL query, Async query, or SOSL search to retrieve data from the Salesforce Org’s objects.
1. SOQL Query
This option will allow you to select various objects and fields and build queries for them. You can then export the results as a .csv file and perform whatever operations you need from there.

Using the Object dropdown, you can select the objects in the Salesforce Org. The fields column will then show the fields related to that object. Select one of the “View as” options to view the data in your desired format. If you’re looking to retrieve records that match certain conditions, you can use the “Filter results by” option.
2. Async SOQL
If you have a particularly large dataset, you can use the Async SOQL option to process the query in the background. For example, if your company is looking to retrieve data from all opportunities from the previous 10 years, normal SOQL queries will hit a timeout limit.
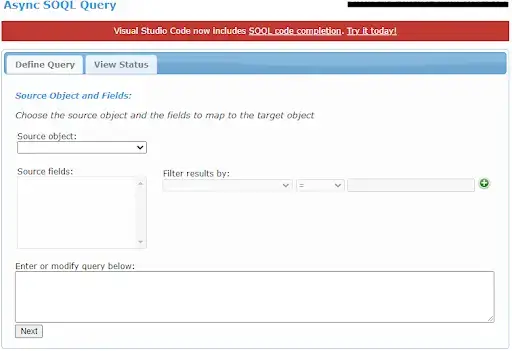
Select the source object and desired fields, along with any filter condition if you want, and then click the “Next” button. The next screen shows the mapping of the selected source object. You can choose either Insert or Upsert, then map the target fields with source fields. After you hit the “Submit” button, the query will execute in background mode.
The status of the query can be viewed in a different window. Make sure that the ASYNC QUERY functionality is enabled in the settings or you’ll receive an error.
Migration
The Migration process is a very important step for a developer. With Workbench, this process is simplified. If you hover over the Migration tab, you will see an option for “Deploy” and “Retrieve”.
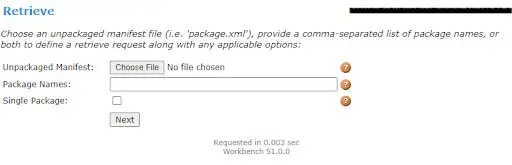
1. Retrieve
Objects, Apex classes, etc. can be retrieved here by submitting an unpackaged XML manifest file. You can find example package.xml files here. You may also define the required components in a comma-separated list, or use both the list and manifest together.
You’ll then be able to download the .zip file, which can be deployed in the production environment or any testing environment.
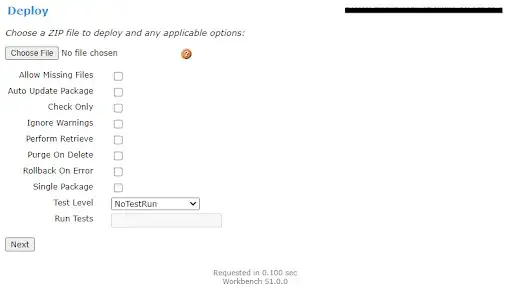
2. Deploy
Visit the deployment tab and upload the .zip file you retrieved in the previous step. Optional fields can be selected as shown below.
Data
Under the Data tab, you can perform following operations on selected objects:
- Insert
- Update
- Upsert
- Delete
- Undelete
- Purge
Create a .csv file containing the records that you would like to perform an action on.
You may ask, “How is this different from Data Loader?” Data Loader in Salesforce works fine, but has a slight disadvantage. For updating one or two records, you need to export a .csv file, modify the data in Excel, then load it. But by using Workbench, we just need the record id of the record we want to update and can then directly perform the operation.
Utilities
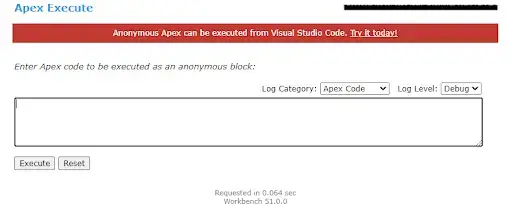
Arguably one of the best features of Workbench is the ability to run Apex Code. By hovering over the Utilities tab and selecting “Apex Execute”, you will see the below window where you can Apex Code as an anonymous block.
Learn more about our consulting services for Salesforce.