Omni-Channel: Setup and Configuration
Salesforce has unquestionably revolutionized the way businesses handle customer relations. But before you get a solid grasp on the platform, you may find yourself doing unnecessary work. Take, for instance, case routing. When a case is created in Salesforce, are you manually assigning it to the proper agent?
If so, you’re in luck! There’s a super-powerful workload automation tool already included in your service cloud to manage workloads. You can tell it how to route, when to route, what to route, to whom to route, and you can even jump in to the rescue when your team needs help. You’ll even get real-time data right at your fingertips!
Omni-Channel is a customizable feature that can handle the priority of work items. It acts like a supervisor who assigns the right work to the right person at the right time. Salesforce allows routing leads, cases, and several other custom objects using Omni-Channel. You can get started by following the steps below.
First, enable Omni-Channel for your Salesforce organization
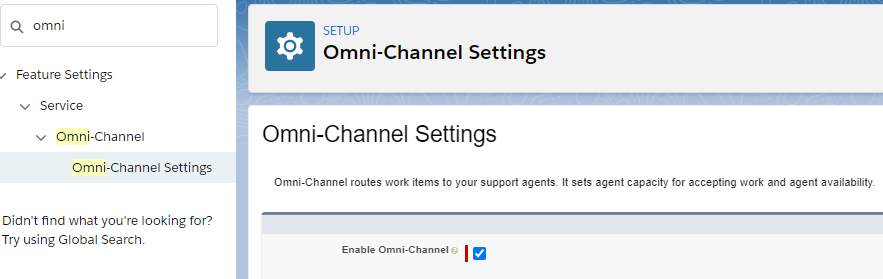
Navigate to Setup > Build > Customize > Omni-Channel > Omni-Channel Settings and click the checkbox next to Enable Omni-Channel.
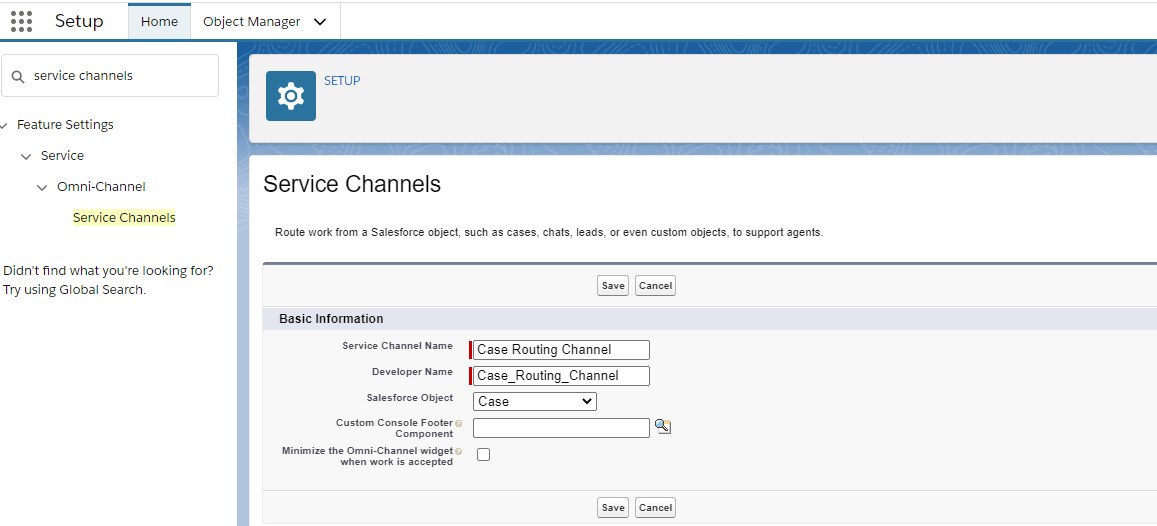
Create a service channel
After enabling Omni-Channel, create a Service Channel. This will allow you to turn case records into a work item so that Omni-Channel can route them.
You can do this by navigating to Setup > Build > Customize > Omni-Channel > Service Channels > New.
Create a routing configuration
Each case that’s created should have some type of priority level assigned to it, that way important issues can be taken care of right away. Also, you can set each agent’s work capacity to ensure that they don’t get overwhelmed. These can be set by adding a Routing Configuration.
Navigate to Setup > Build > Customize > Omni-Channel > Routing Configurations.
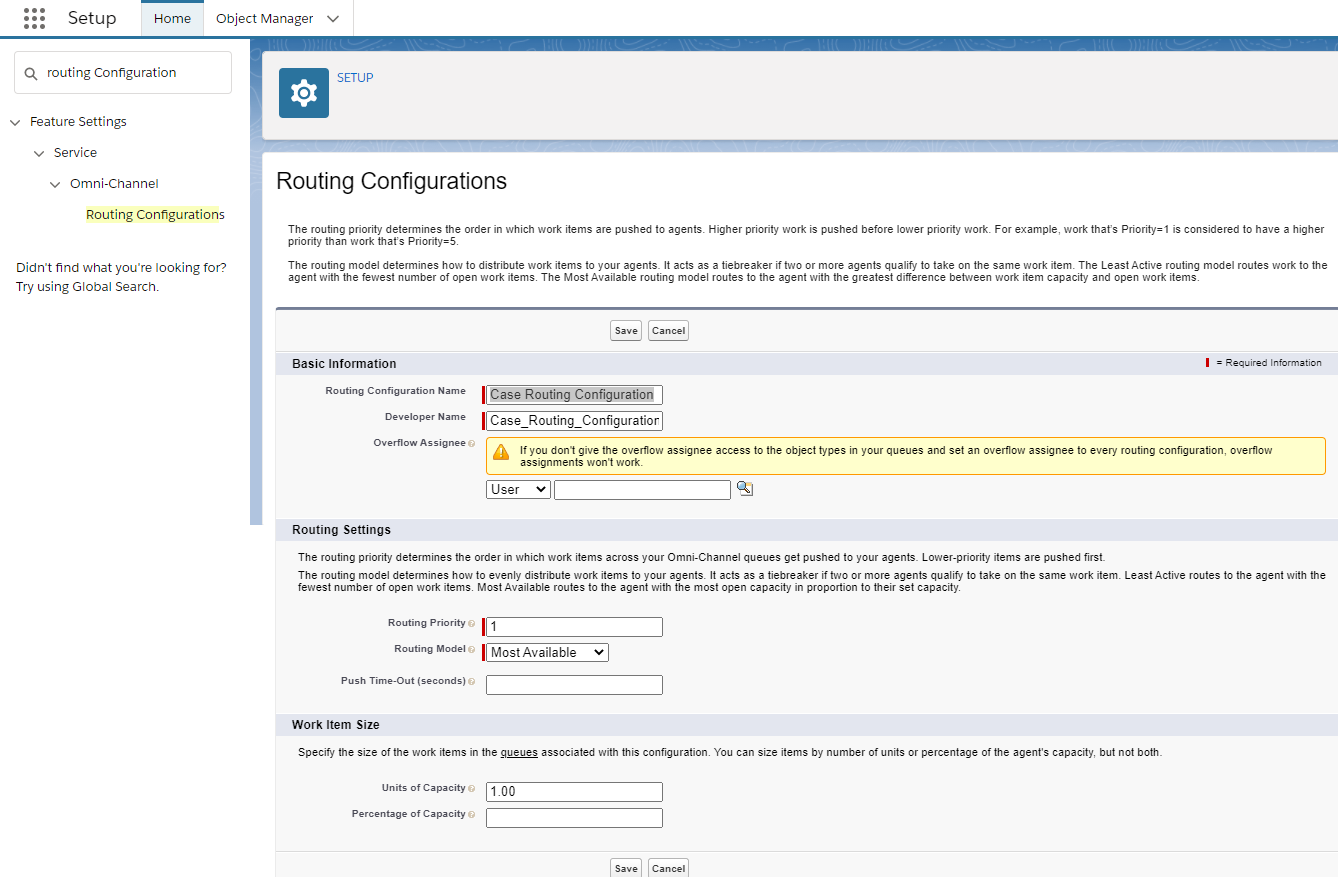
The Overflow Assignee in this configuration sets the user or queue when your org exceeds the Omni-Channel limits.
The Routing Priority defines the order in which work items from the queue are routed to agents.
The Routing Model determines how to evenly distribute work items to your agents. There are two options:
- Least Active: Incoming work items are routed to the agent with the least amount of work compared to other agents.
- Most Available: Incoming work items are routed to the support agent who has the maximum difference between work item capacity and the work items they are working on.
Configure queue
Now, configure a case queue to route the incoming cases (work items) and add the agents to it.
Navigate to Setup > Home > Users > Queues.
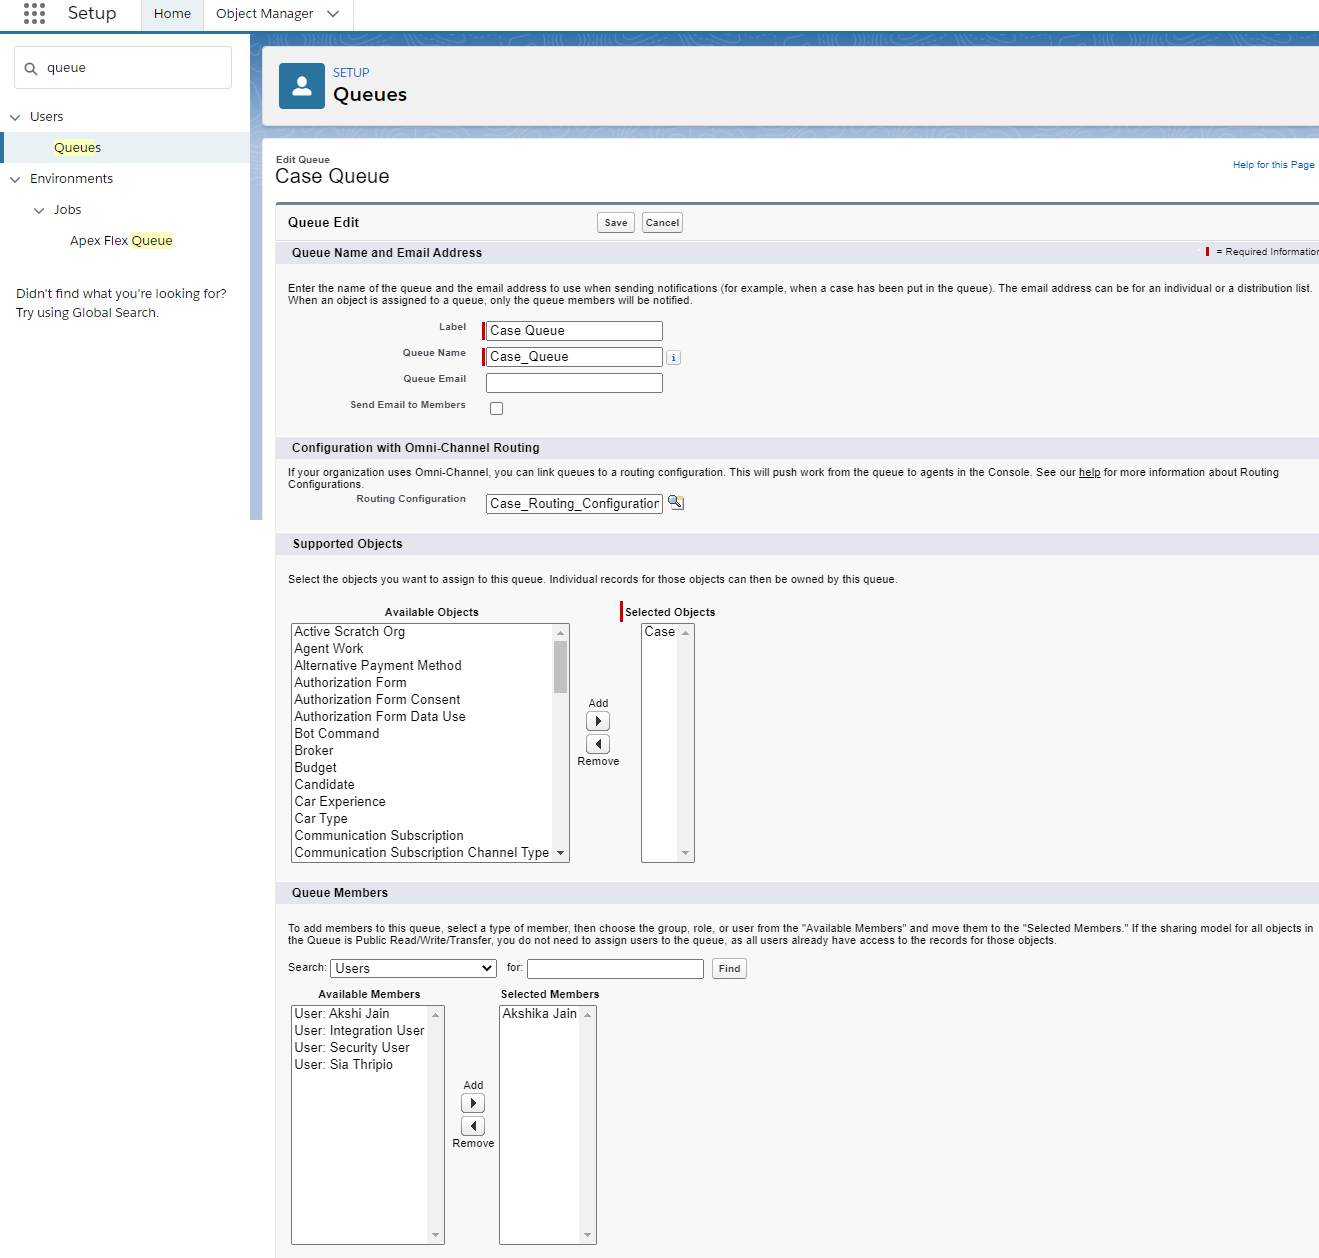
Notice the new Routing Configuration lookup field. Here you can set the Routing Configuration we created previously.
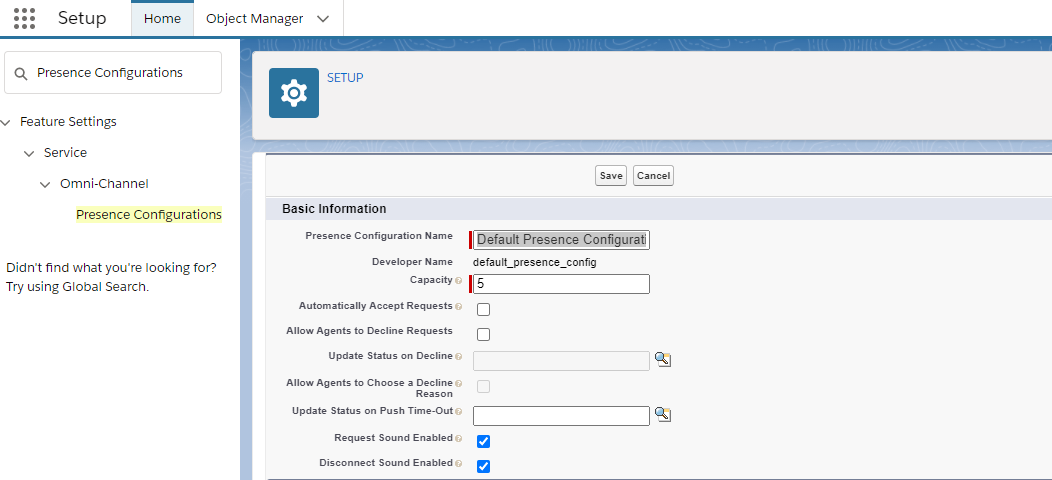
Setting up presence configurations
Presence Configurations determine how much work the support agents can take on and what
Omni-Channel features they can access. Unless you assign them to another configuration, all of the support agents are assigned to the Default Presence Configuration. Each agent can be assigned to only one Presence Configuration.
Navigate to Setup > Build > Customize > Omni-Channel > Presence Configurations.
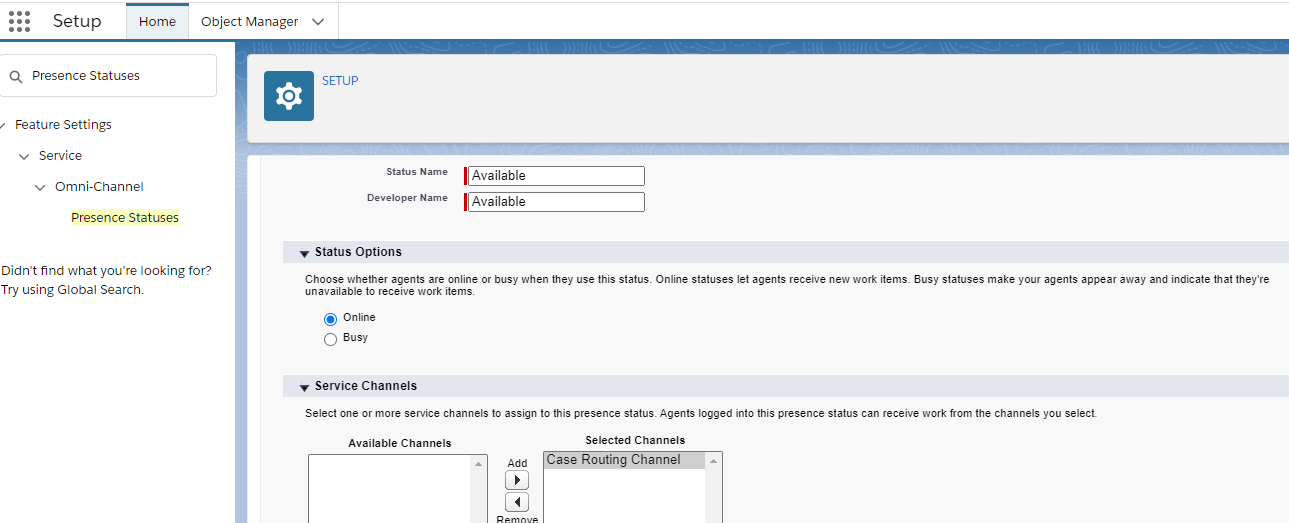
Create presence statuses
After setting the Presence Configuration, we need to check if the agent is available or unavailable.
There are two statuses: online and busy. The “online” status lets the agents receive new work items, while “busy” makes the agents appear away and they may not receive work items.
Navigate to Setup > Build > Customize > Omni-Channel > Presence Statuses.
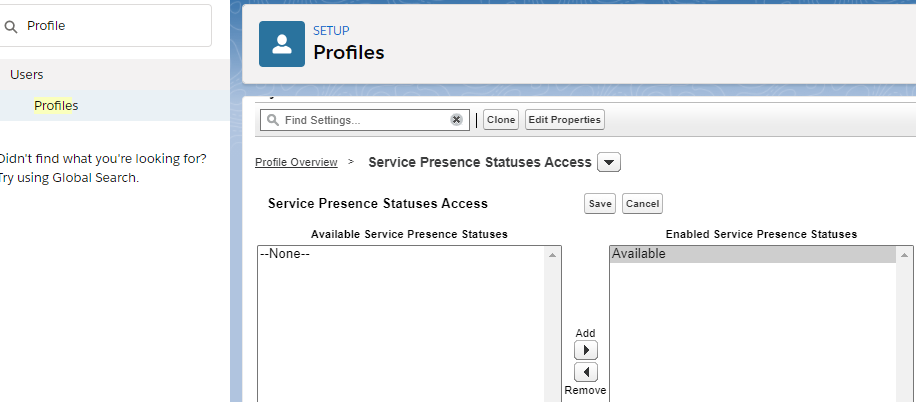
Add presence status to user profile
After setting the Presence status for Case Routing Channel, we need to assign these to a profile the agents are using, so the agents can access these statuses.
Navigate to Setup > Home > Profile > Select desired profile > Scroll down to Service Presence Status Access > Add the Presence Status.
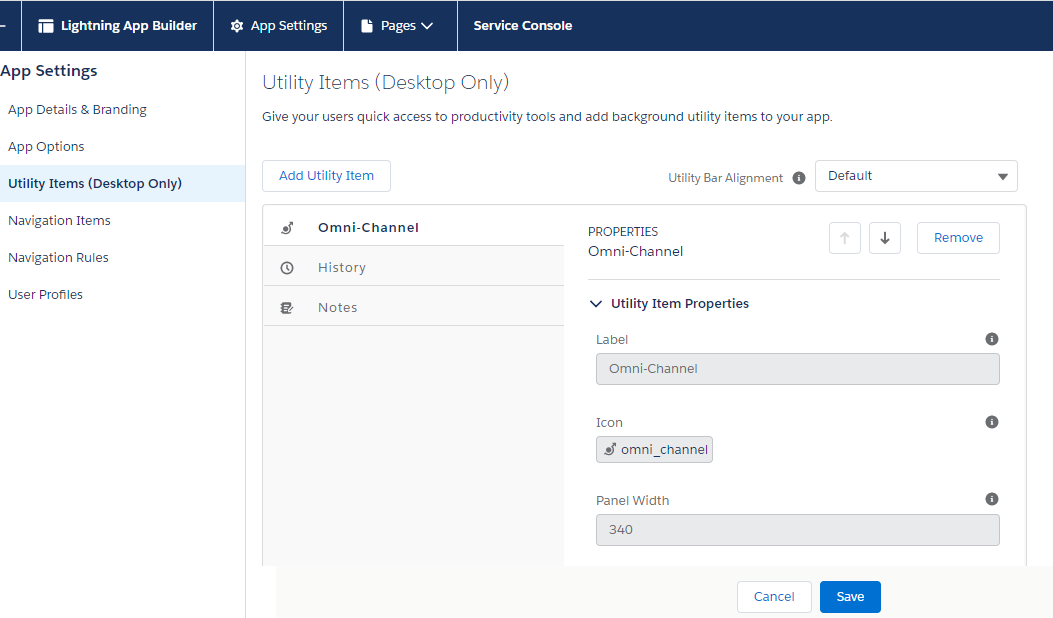
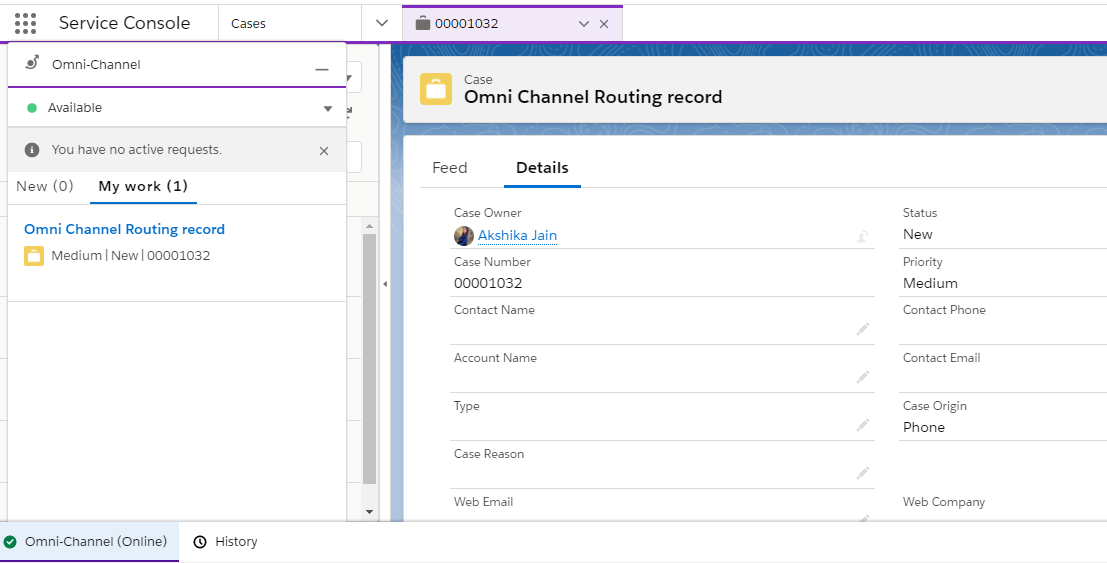
Add the Omni-Channel widget in the service console
Finally, add the Omni-Channel in your service console app, where it will exist as a utility item. Once you’ve done this, your agents can now receive automatically-routed cases!
Navigate to Setup > Home > App Manager > Service Console > Edit > Utility Item > Add Omni-Channel.
Create a new case and check is it routed correctly
Create a new case and change its owner to the Case Queue we configured for the Case Routing Configurations. When an agent becomes available on the Omni-Channel, they will get a request to accept this case. Once the agent accepts it, Salesforce will update the case owner with the agent’s name and let them work on the case.
Omni-Channel is an incredibly powerful automation tool that can be enabled without any custom coding. With the relative ease of setup and productivity increase it provides, it’s an essential feature to enable on any Salesforce org.
Subscribe to our blog for more technical information and industry news.