The Possibilities with Multilingual Dashboards in Tableau CRM
Have you ever thought about a dashboard that is viewable in multiple languages depending on user location or language preferences, but wondered if it’s even possible? Well, the answer is yes, and it can be done in a few easy steps. Let’s first identify the use case where having a dashboard in multiple languages becomes the necessity.
Use Case for Multilingual Dashboards
Suppose the Salesforce Org that you are working on is used across various geographical locations. A dashboard would be best accessed if the text labels within it display the language most commonly used in each particular region.
Steps to Set Up Multilingual Dashboard
A multilingual dashboard can be achieved in a series of steps.
Step 1: Create a Custom Metadata Type in Salesforce for Each Dashboard
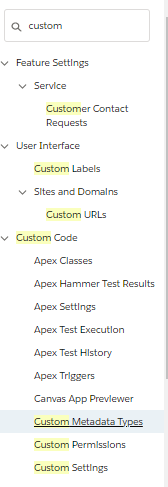
Simply go to Setup→
Type Custom in Quick Find Box→
Select Custom Metadata type.
Then create new a Custom Metadata type with the following label and api name as given:

For each label in a dashboard, create a custom picklist field in the Custom Metadata type. For instance, let’s say the demo dashboard looks like this:
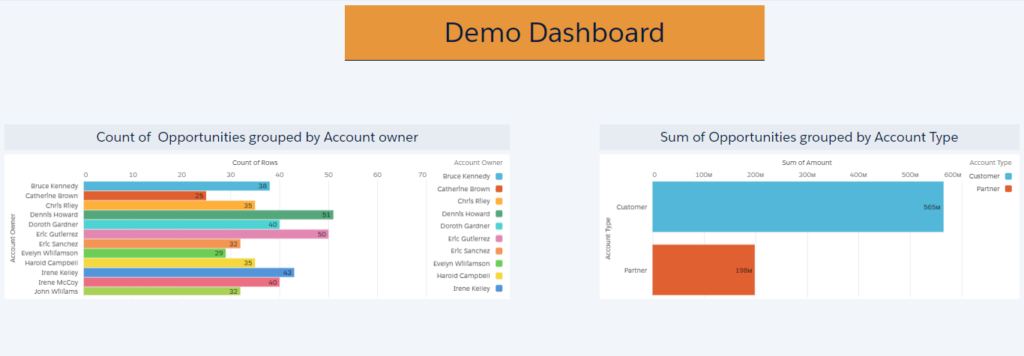
We can clearly see that there are three labels in the dashboard, so the in the next step, we will create three picklist fields in the DemoData Custom Metadata type as follows:

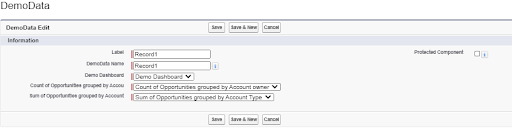
Then, create a single record for DemoData by selecting values for custom field as given below:
Step 2: Adding Translation Using Translation Workbench
For each language that the dashboard should support, a translation would be added. This is when the translation workbench is used. Remember, the translation workbench does not translate the labels — it only stores the translation for labels that we add into it.
- To do so, go to setup → translation workbench → translate.

- Select the language for which the translations will be added, then the object (Custom Metadata) that was created. In the setup component, opt for Picklist Value.
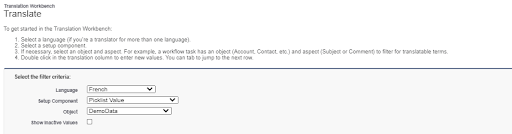
- In the lower panel, add translation for all the picklist fields, and click save.

*Note: By doing this, we have created a separate translation list for a particular language.
This will be used in the dashboard using the tolabel() function in SOQL query.tolabel() to convert the fields into the user’s language if the translation workbench is enabled. The SOQL, along with tolabel(), displays the labels in a language based on the currently selected user locale field.
Step 3: Adding SOQL Query for DemoData to the Dashboard
The SOQL query to fetch the field from DemoData would appear as shown below:

Step 4: Adding Result Binding to the Text Labels in the Dashboard
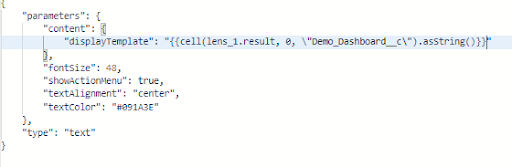
Finally, our last step would be to bind the fields to the labels in the dashboard. Pass the SOQL field result to the text label using result binding as follows:
Final Results
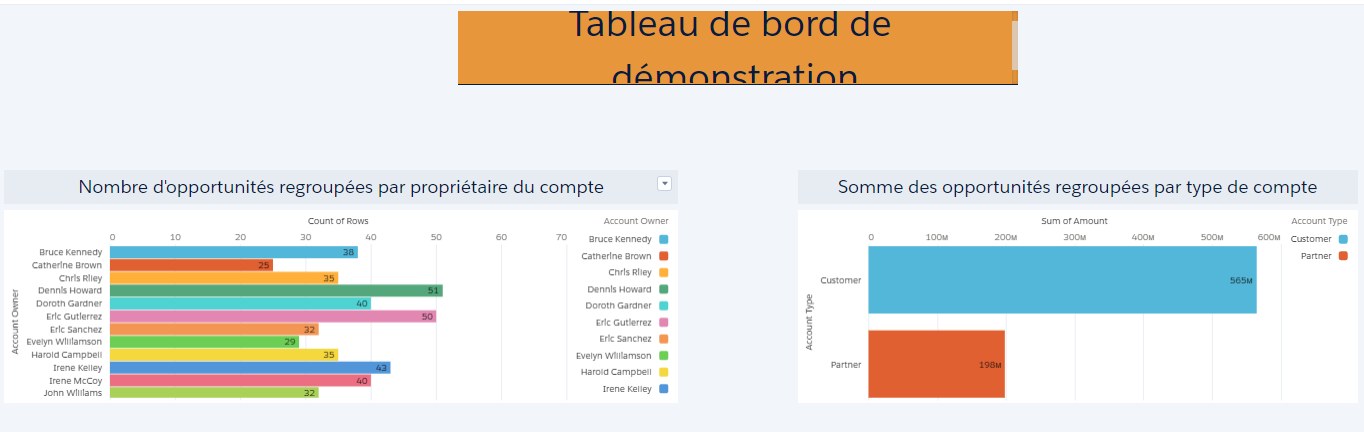
With the simple change in user’s locale, the language of dashboard labels would update as shown in the diagrams below.
To test this, change the default locale of the user to French, and see the magic for yourself!
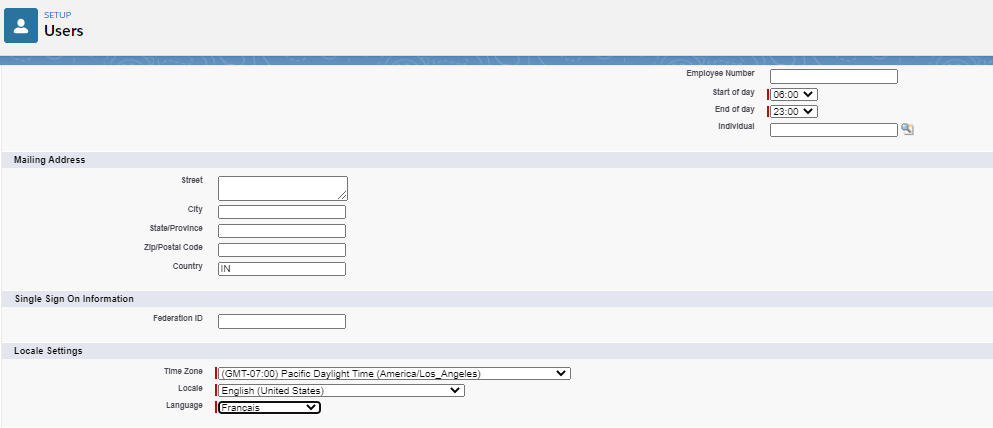
After updating the user language to French, the language of dashboard labels have automatically changed to French. Voila!
Learn more about Atrium’s analytics expertise and services.